
This week we'll show you how Anne created a neat seat for her bathroom. The total, including materials, was just $7.00!

Here's the blog post she wrote for us:
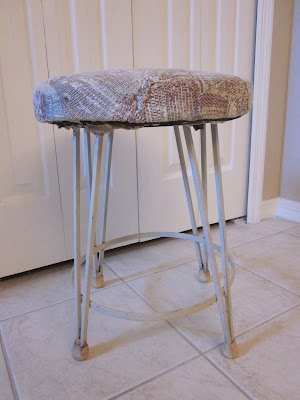
I found this stool at my local Goodwill for $3.99. It was quite sturdy so I made an executive decision to invest in it. It just needed a makeover so it would look fresh and new in my bathroom!
I cleaned the base with soap and water to remove the dirt and grunge. Then I used a screwdriver to remove the yucky rubber gasket that was used to support the staples holding the old fabric to the stool.

The gasket pretty much fell apart as I worked, so I used a small cat's paw to remove any tacks that were left behind. I also pulled off the old rubber feet since they were dried out and cracked. I picked up a replacement set of 4 for $1.99!


I didn't bother to take off the old cover since the fabric was still in good shape and would make a nice sturdy base for the material I was going to use to recover the stool. So I took the stool outside and spray painted it with a primer and then a paint called satin green apple. I let the paint dry between coats and checked to make sure I had covered all edges. The cost of the paint in this step was less than $1.00!

After the paint dried thoroughly I put on the new rubber feet. Then it was time to work on the material for the seat. I had a small leftover piece of one of our most popular fabrics. I laid it out on the floor to check that it'd be big enough to cover the seat.

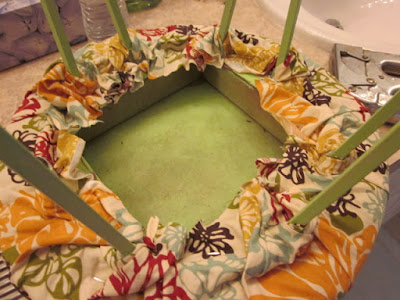
Then I went to work with my staple gun. I stapled as close to the metal underside of the stool as I could, carefully gathering and stapling material as I traveled around the base of the stool.

This is what it looked like after I finished stapling around the base. It reminds me of a flower!

Because I didn't want to see the metal band around the base of the stool I continued to staple the material on the inner part of the metal band, again gathering material as I went along, particularly at the top of the legs of the stool to create a puffy look.

Once that was done I trimmed away all the excess material from the underside.

I stood the stool upright to check that my work was neat and clean. I was very happy with it!
Now, for about $7.00 and an hour's work (not including paint drying time), I have a one-of-a-kind bathroom stool!

Like this fabric? We have a few items left in our shop that feature this print.
I publish 3 new blog posts each week! Check out the schedule. You can also click on the link below for blog updates.


Here's the blog post she wrote for us:
I found this stool at my local Goodwill for $3.99. It was quite sturdy so I made an executive decision to invest in it. It just needed a makeover so it would look fresh and new in my bathroom!

I cleaned the base with soap and water to remove the dirt and grunge. Then I used a screwdriver to remove the yucky rubber gasket that was used to support the staples holding the old fabric to the stool.

The gasket pretty much fell apart as I worked, so I used a small cat's paw to remove any tacks that were left behind. I also pulled off the old rubber feet since they were dried out and cracked. I picked up a replacement set of 4 for $1.99!


I didn't bother to take off the old cover since the fabric was still in good shape and would make a nice sturdy base for the material I was going to use to recover the stool. So I took the stool outside and spray painted it with a primer and then a paint called satin green apple. I let the paint dry between coats and checked to make sure I had covered all edges. The cost of the paint in this step was less than $1.00!

After the paint dried thoroughly I put on the new rubber feet. Then it was time to work on the material for the seat. I had a small leftover piece of one of our most popular fabrics. I laid it out on the floor to check that it'd be big enough to cover the seat.

Then I went to work with my staple gun. I stapled as close to the metal underside of the stool as I could, carefully gathering and stapling material as I traveled around the base of the stool.

This is what it looked like after I finished stapling around the base. It reminds me of a flower!

Because I didn't want to see the metal band around the base of the stool I continued to staple the material on the inner part of the metal band, again gathering material as I went along, particularly at the top of the legs of the stool to create a puffy look.

Once that was done I trimmed away all the excess material from the underside.

I stood the stool upright to check that my work was neat and clean. I was very happy with it!
Now, for about $7.00 and an hour's work (not including paint drying time), I have a one-of-a-kind bathroom stool!


Like this fabric? We have a few items left in our shop that feature this print.
I publish 3 new blog posts each week! Check out the schedule. You can also click on the link below for blog updates.
No comments:
Post a Comment